 |
|||
 
This is the first of three bulletins about relatively easy repairs you can perform on your RV, and important facts you need to know about roofing and sealants. |
|||
 For small punctures, cracks or tears, a sealing tape designed for RV roofs can do a nice job. Dicor Products offers this simple solution with its Patch-Kit™ package. First, some things to note: For small punctures, cracks or tears, a sealing tape designed for RV roofs can do a nice job. Dicor Products offers this simple solution with its Patch-Kit™ package. First, some things to note:
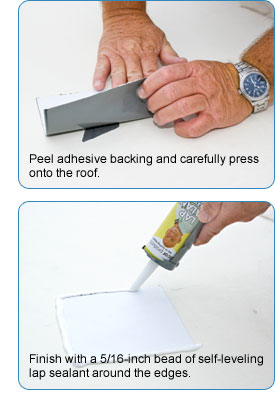
Using the easy-to-use patch, with the adhesive backing still on, position the patch and mark the edges in pencil or chalk for a positioning guide. Cut the patch to size, peel off the adhesive backing and, with great care (if you pull it up once it is down, you need to replace the patch with a new one), press it onto the roof surface using a wallpaper seam roller, and smooth it out from the center to the edges, making sure the entire patch is tightly bonded to the roof. Then apply a 5/16-inch bead of self-leveling lap sealant to the edges. Give it a couple hours to set up before moving the vehicle. More detailed instructions can be found here on the Dicor Products website. Our next bulletin is coming soon and will cover the use of lap sealants. |
||
You are receiving this email because you have asked to receieve industry related product and service announcements from Dicor Products. If you would no longer like to receive these emails you may unsubscribe at any time using the link below. |